July 7th, 2020 7 Minutes
I'm someone who's always had my own tech blog, I've gone through two revisions already with the last revision updating out of a 1997 style book. How much I contribute to the blog has always depended on how much friction and effort it takes to write content, manage and upload photos and paste in code.
My previous revisions at its core have always been dependent on using opensource wysiwyg editors. Which for me have been deficient in several ways.
- Behind the scenes, they produce HTML which always contains ghost 👻 spaces.
- You always have to build in your own system to upload and manage photos.
- Pasting in code and getting it to format correctly has always been difficult. The content I write belongs to the actual website, so every time I change or rebuild my website I have to migrate all my content across.
With all this in mind, I wanted a solution that leverages a content management system that supports markdown. Is free and open source, and easily extendable using a modern JavaScript framework. The combination I chose contains the following,
- Gatsby Framework built on React that creates a really fast experience and is easily extendable.
- Contentful One of the leading content management systems that support markdown.
- Disqus One of the most popular commenting systems mainly chose this as a continuation from my previous website.
- Github Pages Free hosting by the GitHub guys.
Due to everything being either free or opensource, you can download the source code here, follow the steps in the readme or below in this article and get started with your own tech blog.
Why use Contentful?
If your someone like me and you don't want to be restricted to the world of WordPress websites, Contentful is the next best thing. As the name describes its a repository for your content and nothing else. Where Contentful really shines is in how easy it is to get your content out. Everything is API accessible and in a JSON format, so if I ever decide to build v4 its just a case of hooking up the CMS.
Contentful also supports writing in markdown format which is absolutely crucial if you're going to be pasting in code (as markdown supports syntax highlighting you will get the most accurate code colours when rendering).
Why use Disqus?
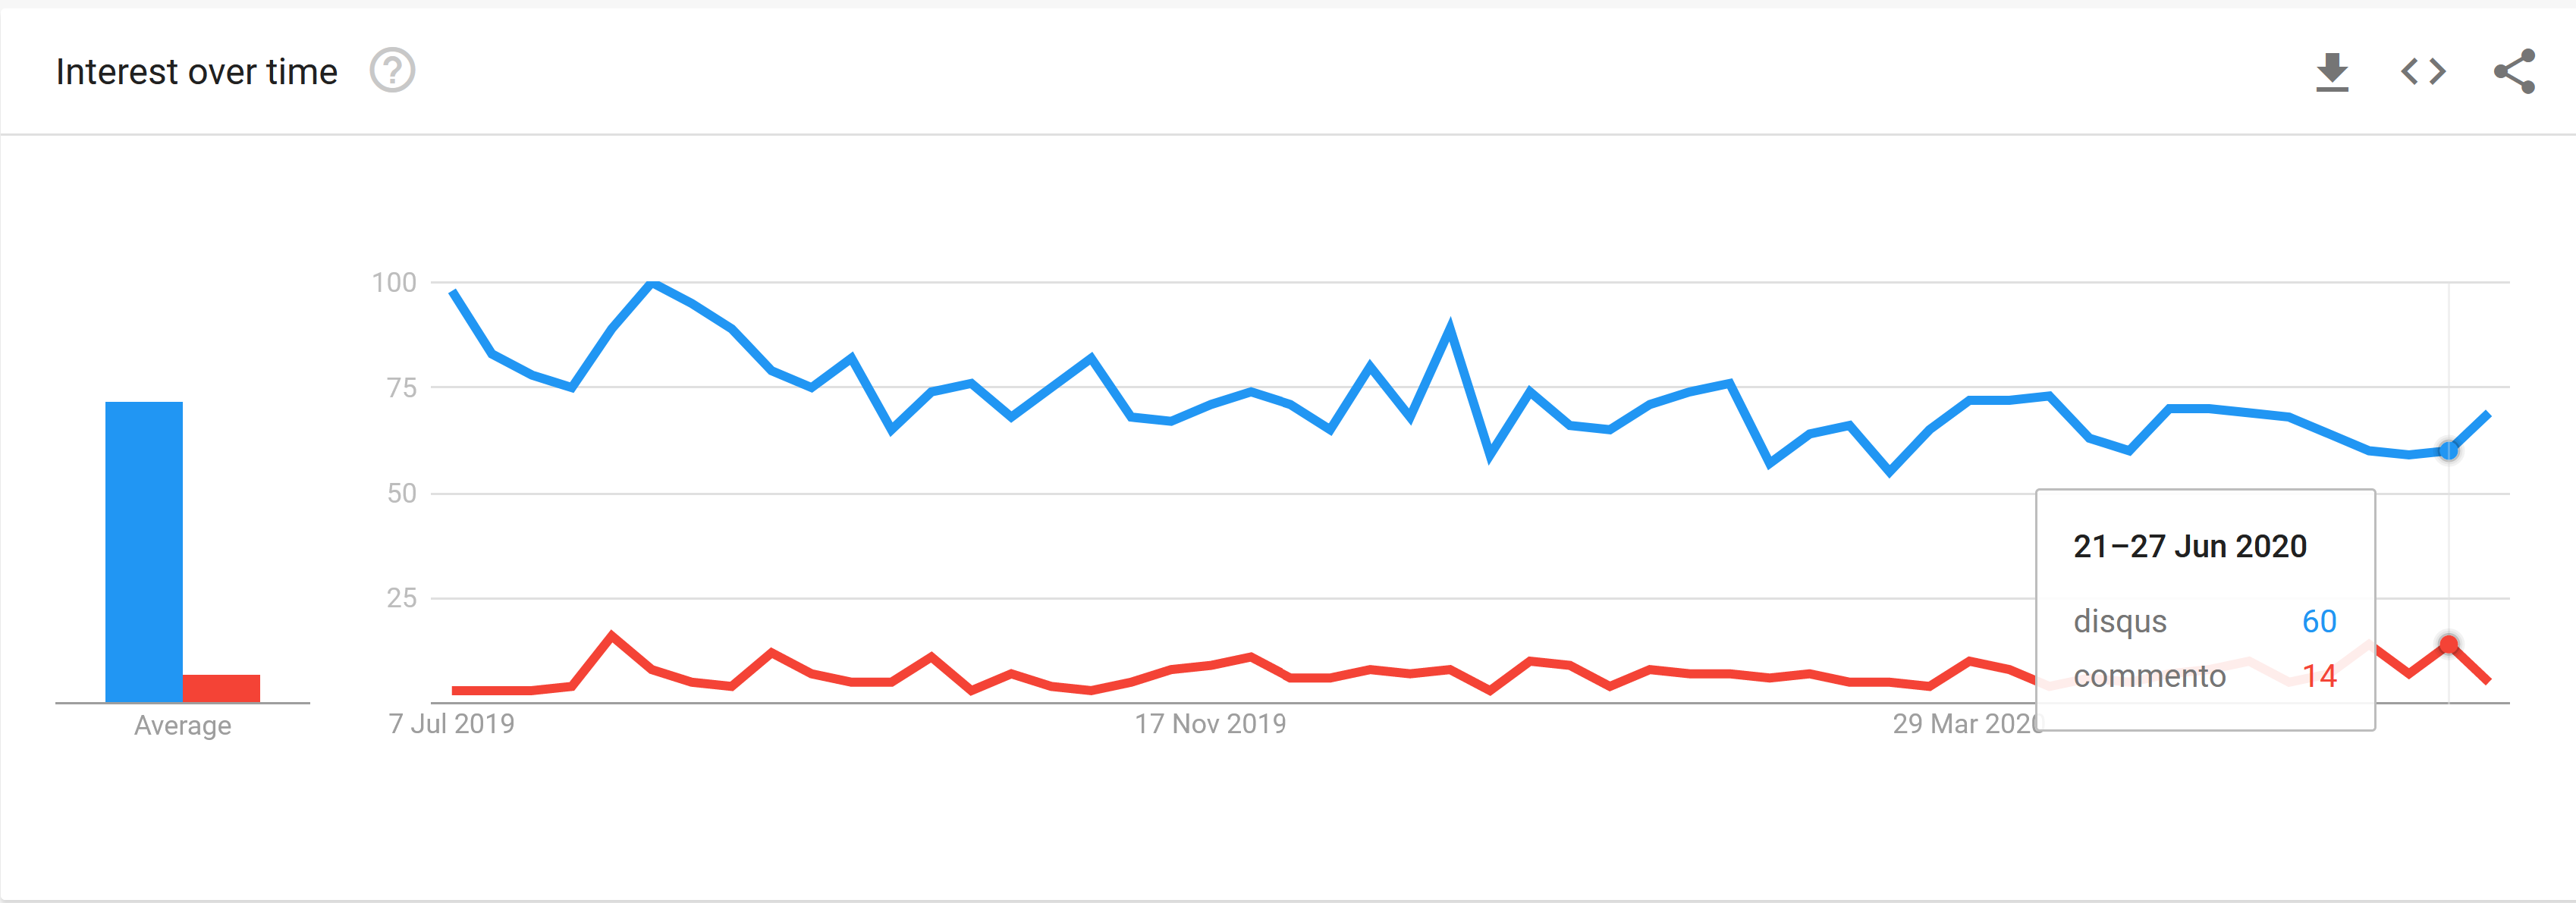
As mentioned Disqus was mainly a continuation from the previous version of my website, there are however some plus points to using Disqus. Namely the popularity (See image below), Disqus is by far the most popular commenting system out there, its also incredibly easy to get set up.
There are some annoyances however, namely the lack of markdown support, which could be an issue if a commenter wants to post a code snippet.
Perhaps at some point I will migrate to using Commento, theres a great article comparing the two here.
Why GitHub pages?
Firstly it's free hosting! What more do you want...
I have always relied on using Azure to host my pages but unless you got a Biztalk account there's a cost in doing so. Github allows you to host content on their website for absolutely free, its got two forms of public pages.
- Personal pages
This sits under your personal repository path, so in my case my username is faesel (https://github.com/faesel/), when creating a repository called 'faesel' and enabling pages. GitHub gives you the domain https://faesel.github.io. What's amazing is (provided your DNS is setup correctly) they also handle SSL certificates for your behalf.
- Project pages
Github also supports project pages which sit under a subdomain of your repository, for example a repository with the link https://github.com/faesel/faesel-blog would resolve into public page URL for https://faesel.github.io/faesel-blog.
For my blog option 1 was chosen. There is one caveat to personal pages, your published output needs to reside in master and your actual source code needs to be in another branch. The Gatsby template I have created, uses master and source as the two main branches as you can see here.
Why use Gatsby?
Gatsby lightning fast when it comes to rendering pages, behind the scenes it builds up static pages which you deploy to your website. As it's designed to be a progressive web app, pre-fetching is built it, so when your cycles through different pages on your website the load times are instant.
Gatsby supports a wide range of plugins, 2162 at the time of writing this article. Admittedly some of them are duplicates, but overall they have enough coverage to integrate the vast majority of 3rd party platforms. Below are some plugins I used for my blog:
- gatsby-plugin-feed Used for generating an RSS feed
- gatsby-plugin-sitemap Used for generating a sitemap xml file
- gatsby-plugin-gtag Used for integrating google analytics into your blog
- gatsby-plugin-react-helmet SEO plugin used for setting titles and metadata
- gatsby-plugin-sass Integrating sass
- gatsby-remark-highlight-code Used for highlighting code syntax
- gatsby-source-contentful Used for getting data from Contentful
- gatsby-transformer-remark Used for transforming markdown into HTML
A full list of their plugins can be found here
As Gatsby is built on top of React which means extending your website's functionality is easy. In addition to this data access is all powered through GraphQL which really helps tailor the requests for data in accordance with your UI. All this is setup for you right out the box.
How to use the blog template to create my own tech blog?
As mentioned I have created a Gatsby blog template that you can clone yourself, setup and host all at no cost at all. The code can be found here.
There are some pre-requisites we need to get through before we can begin, mainly creating accounts in the following 3rd partys.
Step 1 - Configuring Contentful
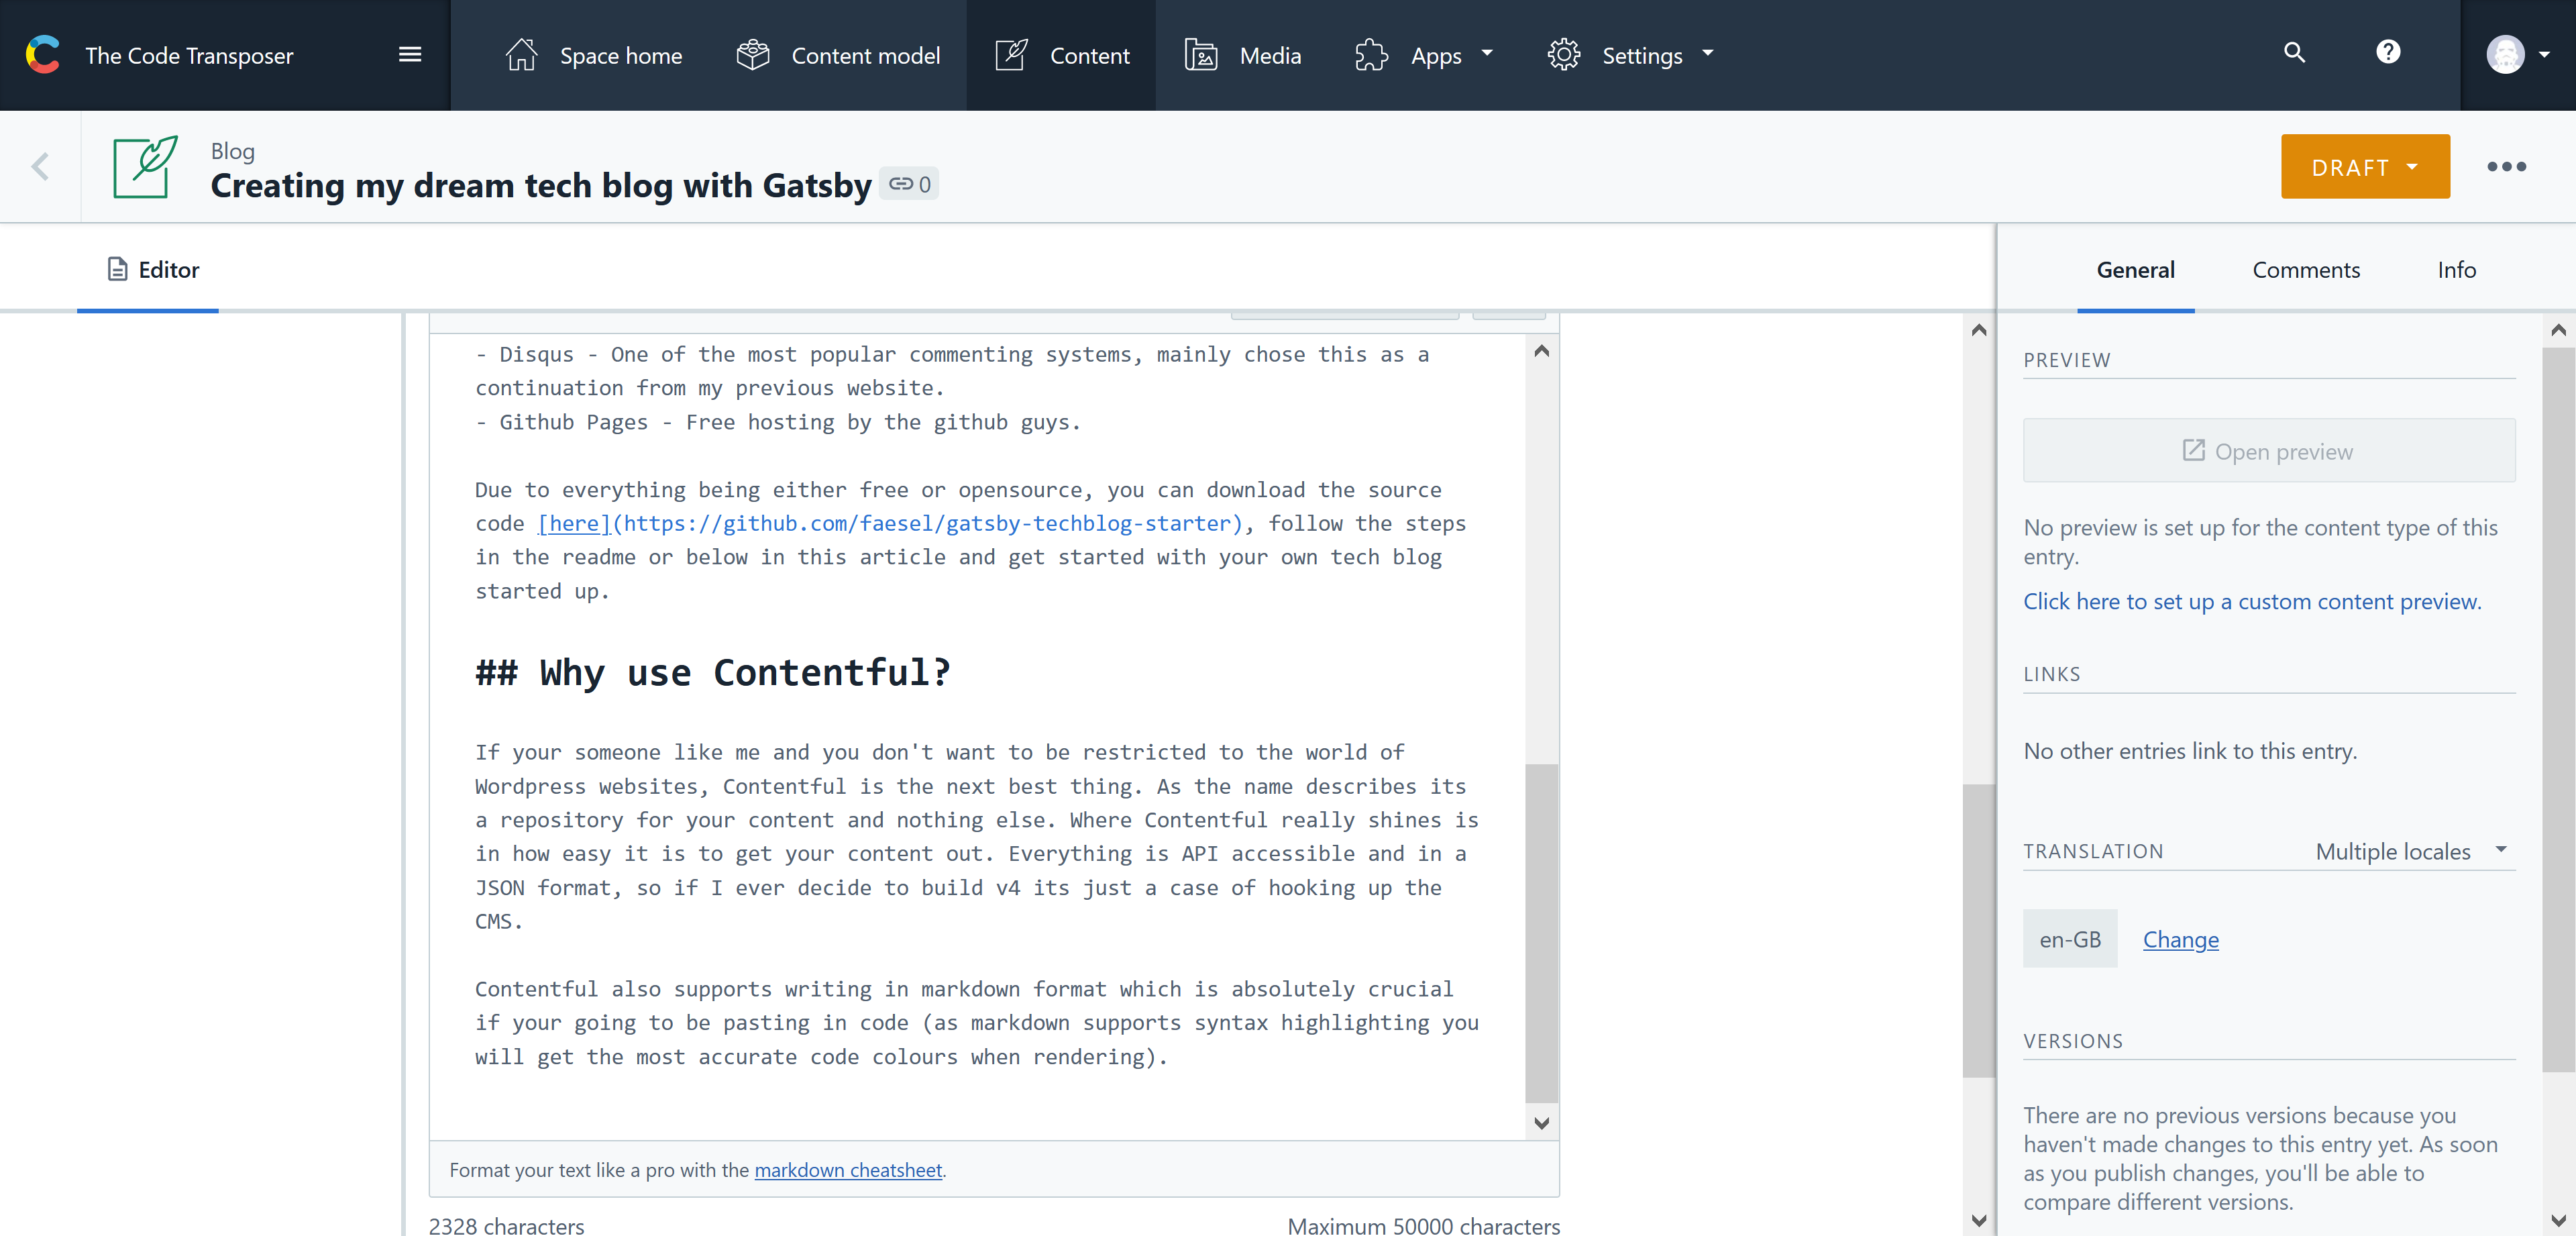
The first step is to configure Contentful by creating a content model. A content model represents all the building blocks required to represent a single blog post. Below is a screenshot of the content model needed:
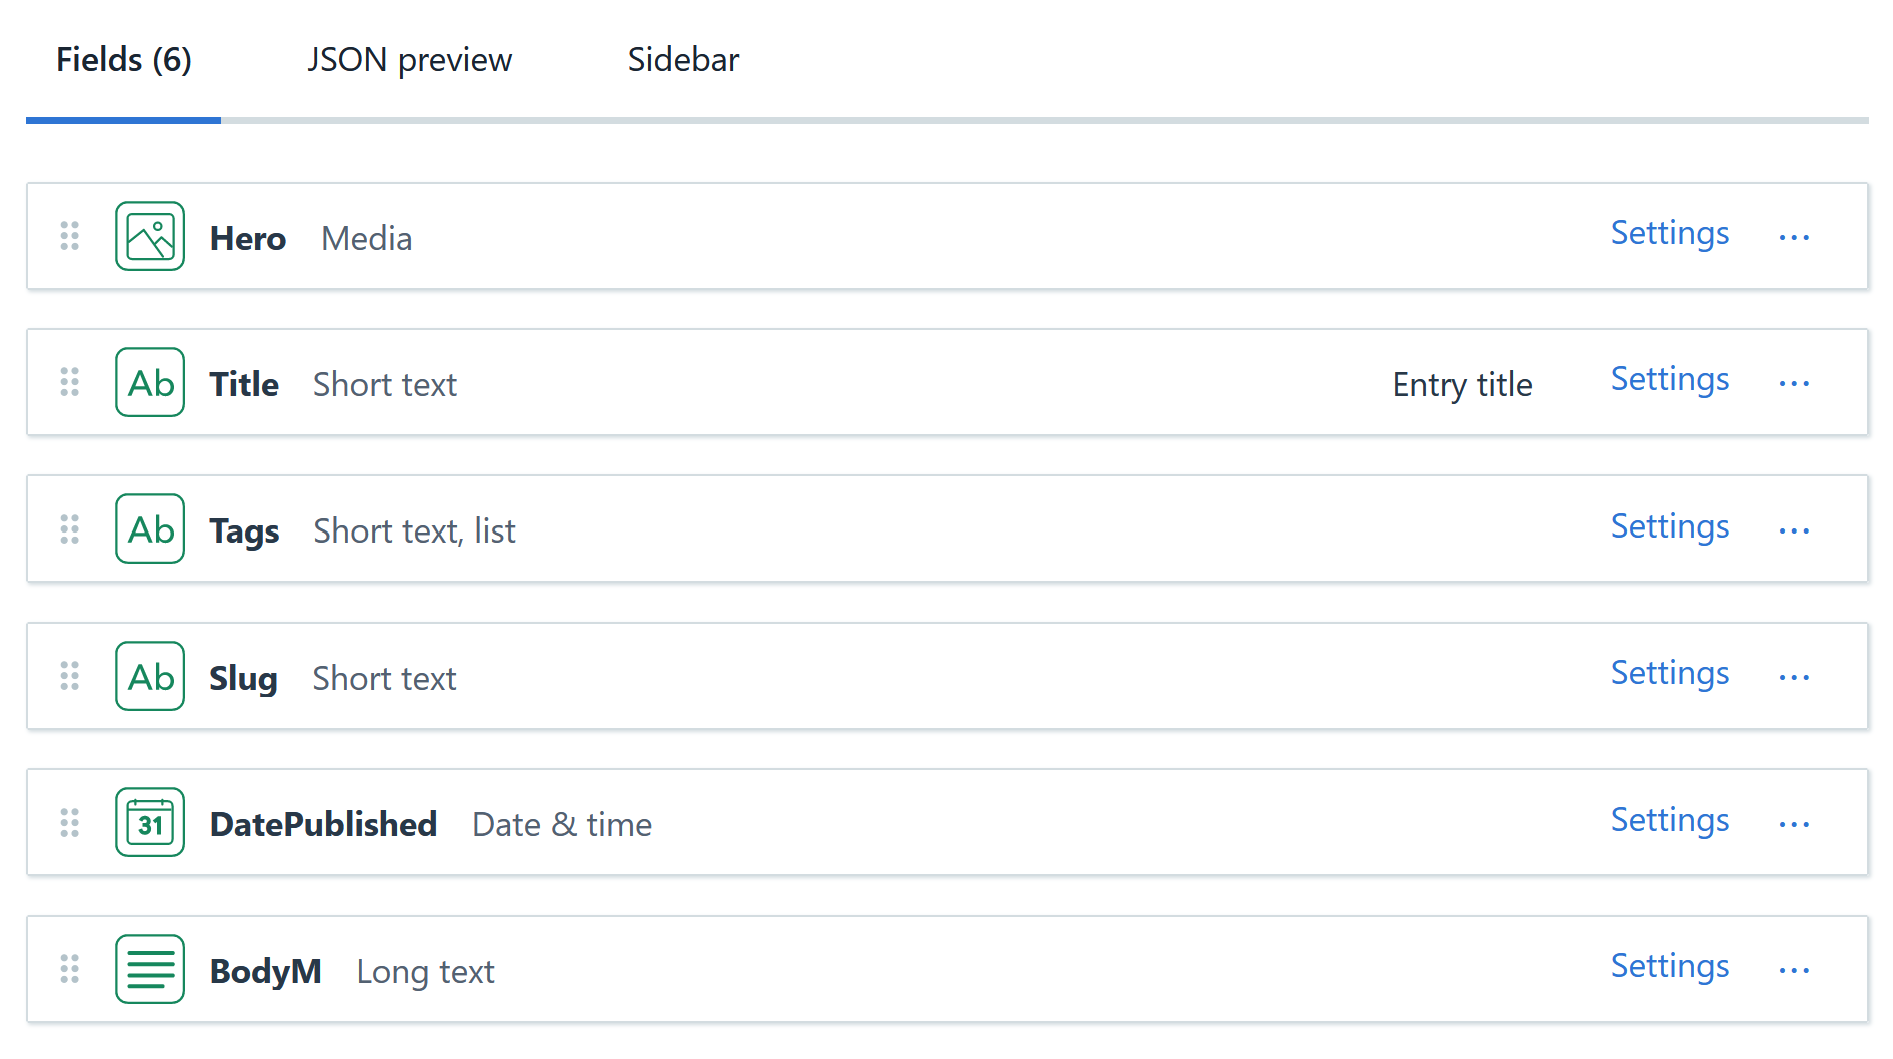
If your creating it manually do remember to set the field 'BodyM' as a markdown field. Once this model is in place, you can begin writing up your first markdown post. To create this model programatically you can run the following command:
npm run setup SPACE_ID CONTENTFUL_MANAGEMENT_TOKEN
The management token can be sourced from Settings > API Keys > Content management tokens
There are two settings we need to take a note of that are needed for Step 2
- Space Id
- Space Access Token
Both of these can be sourced from Settings > API Keys > Content delivery / preview tokens,
Step 2 - Configuring Environment Variables
The next step is to populate your environment variables, the two Contentful keys can be accessed by following Step 1. Setting up google and Discus is optional.
CONTENTFUL_SPACE_ID=
CONTENTFUL_ACCESS_TOKEN=
GOOGLE_TRACKING_ID=
GATSBY_DISQUS_NAME=
Step 3 - Configuring your gatsby config
The gatsby config file is at the root of this project, it contains all the plugins installed into this project.
module.exports = {
    siteMetadata: {
        title: 'FAESEL.COM',
        author: 'Faesel Saeed',
        description: 'Welcome to my great blog',
        siteUrl: 'https://www.faesel.com', //Use the fully qualified url
        social: {
            twitter: 'https://twitter.com/@faeselsaeed', //Use the fully qualified url
            linkedin: 'https://www.linkedin.com/....',
            github: 'https://github.com/....',
            flickr: 'https://www.flickr.com/....', //Feel free to remove this :)
            email: '[email protected]'
        },
    },
}
Once This is filled in your all set to run the project!
Step 4 - Running the project
Begin by installing dependencies:
npm install
Followed by running the website:
npm run develop
Step 5 - Deployment
To deploy the project begin by creating a repository containing your GitHub username "faesel.github.io".
Copy all your code into a branch called source
Run the following command
npm run publish
The command will publish all the static files Gatsby generates into the master branch.
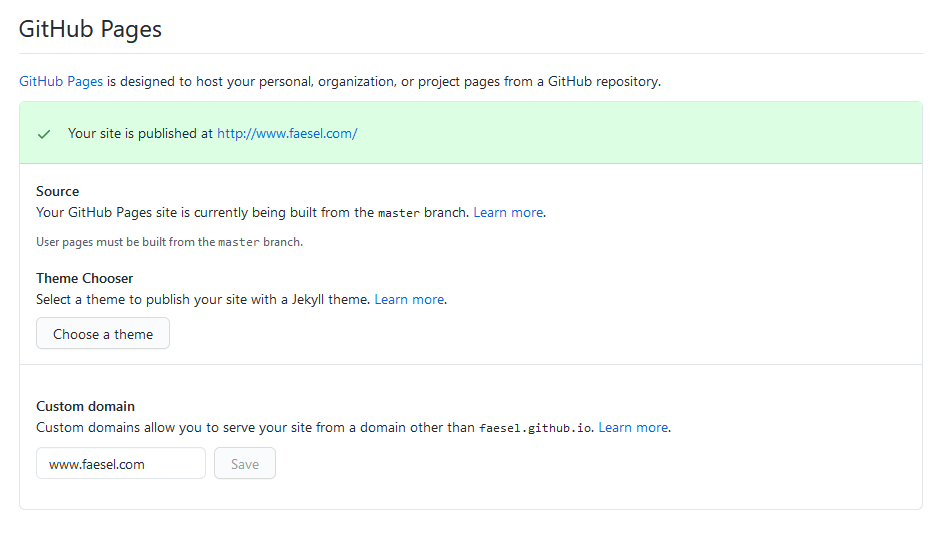
To enable github pages navigate to the Repository > Settings > Scroll down to github pages and select the source branch as master. Also at this step if you can enter in your custom domain. Once setup it should look something like this:
Summary
Its as easy as that, you know have a blog whos content is powered by Contentful! ... time to blog.
As with all things in tech, there are some improvements that got taken off the bucket list.
- Automate deployments by making use of webhooks triggered when publishing content.
- Add a plugin to allow embeding content like tweets, youtube posts ect.
- Add a searching mechanism
- Add pagination
The Honourable mention
This article and the project was inspired by Andrew Mead's 'The Great Gatsby Bootcamp' course which I highly recommend in learning the basics.