Adding environments to ASP.NET Core with React.js SPA
Recently I started working on a project that was created from the ASP.NET SPA template for react. It's one of the templates you get by default with dotnet and can be created by running dotnet new react.
The template creates a dotnet webapp which is designed to be an API backend and links it with a react project to power the UI. When running the project from dotnet, static files are built from the react project and served up.
In terms of running the application with different environments, the dotnet perspective is fairly straight forward as we can simply use the environment variable ASPNETCORE_ENVIRONMENT. But the question is how do we pass this variable to the SPA so that we can shift between different environments?
Having trawled the internet I didn't see any examples, so I decided to create my own!
Understanding the ASP.NET spa template 🔍
Let's begin by creating a boilerplate solution with dotnet new react. Once the solution is created we end up with a backend API with a WeatherForecastController, and a front end app located in the ClientApp folder.

Since this is an integrated spa, from the root of the project we are able to dotnet run and spin up not only the dotnet project but also the react spa.
Client App
The client app itself is in a completely segregated app, there's nothing special added here to make it all connect up. All your standard commands to npm install/build are all available to you. In fact, the template has been build based on the implementation of create-react-app.
You can also start up the project from here with npm run start command which will spin up a development server independent of your backend code. The execution and configuration is handled for us using react-scripts which was designed to help set up react projects without stress, featuring things like hot module reloading, deployment builds etc ... all standard-issue so far. So you get these npm scripts setup for you,
1  "scripts": {
2    "start": "rimraf ./build && react-scripts start",
3    "build": "react-scripts build",
4    "test": "cross-env CI=true react-scripts test --env=jsdom",
5    "eject": "react-scripts eject",
6    "lint": "eslint ./src/"
7  },
Startup Class
The glue that connects the backend to the frontend can be found in the Startup.cs class. Working from top down the first code block of interest is within the ConfigureServices function,
1services.AddSpaStaticFiles(configuration =>
2{
3 configuration.RootPath = "ClientApp/build";
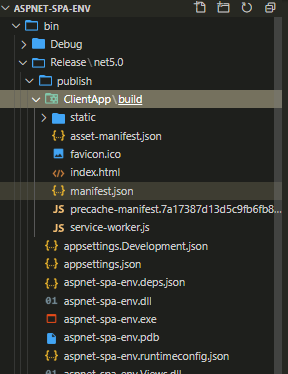
4});This block essentially tells your dotnet app where to find the static resources (production builds) of your spa within its bin folder. So running the command dotnet publish --configuration Release creates a ClientApp/Build folder with a production optimised (ie npm run build) version of our SPA, the root path simply points to this.
The next block to notice is in the Configure function,
1app.UseEndpoints(endpoints =>
2{
3    endpoints.MapControllerRoute(
4        name: "default",
5        pattern: "{controller}/{action=Index}/{id?}");
6});
7
8app.UseSpa(spa =>
9{
10    spa.Options.SourcePath = "ClientApp";
11
12    if (env.IsDevelopment())
13    {
14        spa.UseReactDevelopmentServer(npmScript: "start");
15    }
16});
There are two things that are happening here, the first is that we have dotnet server side routing connected up (with app.UseEndpoints() middleware), this means that upon receiving a HTTP request server-side routing will always take priority over client-side routing. If server-side routes fall through without matching an endpoint, we use the app.UseSpa() middleware to redirect all requests to the default page (which is your index.html file triggering the spa to load).
The next point is that from here we can also configure the location of our client-side source code, and the command we need to use to run our react spa as a development server when debugging.
MSBuild & Running NPM Commands
The remaining magic is all located in the .csproj file we got 2 core components here the first is the Debug target,
1<Target Name="DebugEnsureNodeEnv" BeforeTargets="Build" Condition=" '$(Configuration)' == 'Debug' And !Exists('$(SpaRoot)node_modules') ">
2  <!-- Ensure Node.js is installed -->
3  <Exec Command="node --version" ContinueOnError="true">
4    <Output TaskParameter="ExitCode" PropertyName="ErrorCode" />
5  </Exec>
6  <Error Condition="'$(ErrorCode)' != '0'" Text="Node.js is required to build and run this project. To continue, please install Node.js from https://nodejs.org/, and then restart your command prompt or IDE." />
7  <Message Importance="high" Text="Restoring dependencies using 'npm'. This may take several minutes..." />
8  <Exec WorkingDirectory="$(SpaRoot)" Command="npm install" />
9</Target>
This chunky block of code runs an npm install command before building your dotnet application. It also features a nice check to ensure you got Node.js installed (I guess for the backend people 😁). It does this with the <Exec WorkingDirectory="$(SpaRoot)" Command="npm install" /> command runner (note SpaRoot is defined a the top as a static property pointing to *ClientApp*).
The second part is the publish target,
1<Target Name="PublishRunWebpack" AfterTargets="ComputeFilesToPublish">
2  <!-- As part of publishing, ensure the JS resources are freshly built in production mode -->
3  <Exec WorkingDirectory="$(SpaRoot)" Command="npm install" />
4  <Exec WorkingDirectory="$(SpaRoot)" Command="npm run build" />
5
6  <!-- Include the newly-built files in the publish output -->
7  <ItemGroup>
8    <DistFiles Include="$(SpaRoot)build\**" />
9    <ResolvedFileToPublish Include="@(DistFiles->'%(FullPath)')" Exclude="@(ResolvedFileToPublish)">
10      <RelativePath>%(DistFiles.Identity)</RelativePath>
11      <CopyToPublishDirectory>PreserveNewest</CopyToPublishDirectory>
12      <ExcludeFromSingleFile>true</ExcludeFromSingleFile>
13    </ResolvedFileToPublish>
14  </ItemGroup>
15</Target>
Again fairly similar concept running a publish first installs dependencies then builds the project. The build artefacts get created in the ClientApp\build folder. The item group block then ensures the build assets are included in your bin\ClientApp\build folder.
Summary
So to summarise, when running in debug mode
- We npm install dependencies
- Build and run the dotnet app
- Run an npm development server
- Begin routing all calls to the backend, and where it fails to the default client page.
In the case of a published application
- We create a published version of the dotnet application
- We npm install dependencies
- We create a production build of the spa in the folder ClientApp\build
- Static files from the spa are included in the output
- Running the application now has a packaged version of the spa its static files are served up upon running the backend.
This is all well and great so far... but the react app gets pre built.. what if we need to run it as part of a different environment? Currently, it's all running off a single .env file!
Adding environments 🆕
Below is my solution for getting environments running across the stack, it also conforms to the dev-ops ethos of,
Build once and deploy many times.
Install the dependencies
To being adding environments we first need to ensure our npm app can support it. For this, we will use the well know env-cmd.
We will also be needing something to manipulate the build folders generated by react-scripts. Since all operating systems are equipped with CLI commands to rename/remove files we don't need anything special to do this. However, because these commands differ from one operating system to the next, it's always a good practice to use something like shx to ensure it works cross-platform.
So let's start with running the install command in the ClientApp folder,
npm install env-cmd shx --save-dev
Add your environment files
Next let's start creating some environment files, the file structure should look something like this, with the .env file containing settings shared across all the environments:
- .env
- .env.staging
- .env.production
Any key on these files need to be prefixed with REACT_APP_ this is a safety feature build in,
You must create custom environment variables beginning with REACT_APP_. Any other variables except NODE_ENV will be ignored to avoid accidentally exposing a private key on the machine that could have the same name.
For now, let's add just add an environment variable that tells us which environment we are in. Do this for both production and staging .env files.
1REACT_APP_ENV='production'To show our environment on the page lets also create a config.js file, that accesses the environment variable.
1export const config = {
2    ENVIRONMENT: process.env.REACT_APP_ENV
3};
And finally output it to the page,
1import React, { Component } from 'react';
2import { Container } from 'reactstrap';
3import { NavMenu } from './NavMenu';
4import { config } from '../config';
5
6export class Layout extends Component {
7  static displayName = Layout.name;
8
9  render () {
10    return (
11      <div>
12        {config.ENVIRONMENT}
13        <NavMenu />
14        <Container>
15          {this.props.children}
16        </Container>
17      </div>
18    );
19  }
20}
21
Add your build scripts
Build scripts are now needed to trigger the environments, we need to make the following amends to the npm scripts section,
1  "scripts": {
2    "build:staging": "env-cmd -f .env.staging react-scripts build && shx rm -rf staging && shx cp -r build staging",
3    "build:production": "env-cmd -f .env.production react-scripts build && shx rm -rf production && shx cp -r build production",
4    "start:staging": "rimraf ./build && env-cmd -f .env.staging react-scripts start",
5    "start:production": "rimraf ./build && env-cmd -f .env.production react-scripts start",
6  }
The scripts prefixed with build are using env-cmd with its respective environment file to create a production build of the app. The shx part is then firstly removing the folder staging/production then copying the build files react-script creates into an environment specific folder.
Similarly the scripts prefixed with start run the app using a certain environment. Note if your trying to run this from the dotnet app, you will need to change the Startup.cs > UseReactDevelopmentServer function to,
1spa.UseReactDevelopmentServer(npmScript: "start:production");Now that this is set up, running the app should show the environment variables.
Modifying your .csproj
The next step is to get this working with dotnet publish! To do this we need to modify the PublishRunWebpack target in the .csproj file to,
1<Target Name="PublishRunWebpack" AfterTargets="ComputeFilesToPublish">
2 <Exec WorkingDirectory="$(SpaRoot)" Command="npm install"/>
3
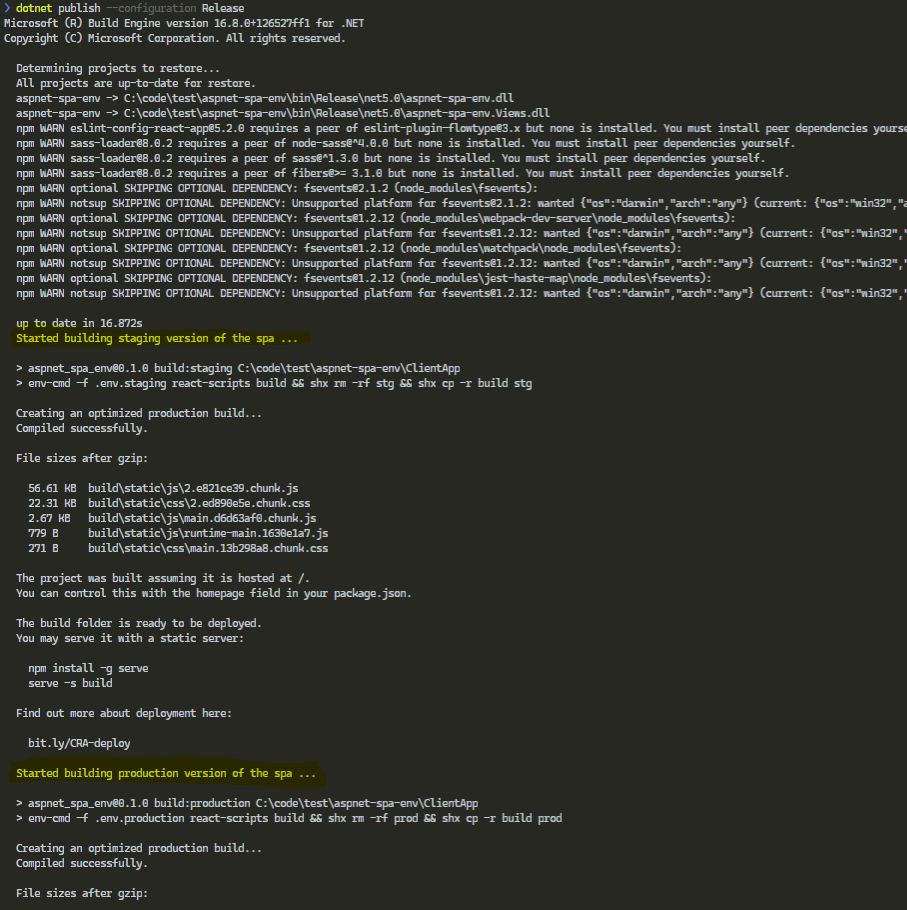
4 <Message Importance="high" Text="Started building staging version of the spa ..." Condition=" '$(Configuration)' == 'Release' "/>
5 <Exec WorkingDirectory="$(SpaRoot)" Command="npm run build:staging" Condition=" '$(Configuration)' == 'Release' "/>
6 <Message Importance="high" Text="Started building production version of the spa ..." Condition=" '$(Configuration)' == 'Release' "/>
7 <Exec WorkingDirectory="$(SpaRoot)" Command="npm run build:production" Condition=" '$(Configuration)' == 'Release' "/>
8
9 <Exec WorkingDirectory="$(SpaRoot)" Command="npm run build" Condition=" '$(Configuration)' == 'Debug' " />
10 <ItemGroup>
11 <DistFiles Include="$(SpaRoot)build\**" Condition=" '$(Configuration)' == 'Debug' " />
12 <DistFiles Include="$(SpaRoot)staging\**" Condition=" '$(Configuration)' == 'Release' " />
13 <DistFiles Include="$(SpaRoot)production\**" Condition=" '$(Configuration)' == 'Release' " />
14 <ResolvedFileToPublish Include="@(DistFiles->'%(FullPath)')" Exclude="@(ResolvedFileToPublish)">
15 <RelativePath>%(DistFiles.Identity)</RelativePath>
16 <CopyToPublishDirectory>PreserveNewest</CopyToPublishDirectory>
17 <ExcludeFromSingleFile>true</ExcludeFromSingleFile>
18 </ResolvedFileToPublish>
19 </ItemGroup>
20</Target>To summarise what's happening here, when building in debug mode we are continuing to use the npm run build command to create a production build and the spa files get stored in the build folder $(SpaRoot)build\**. The output looks like this:
- bin
- Release
- publish
- ClientApp
- build
-spa files go here!
- build
- ClientApp
- publish
- Release
However in release mode we now create two versions of the spa (one for each environment) using out new npm environment builds, npm run build:staging and npm run build:production. The builds also get moved to their corresponding folders.
- bin
- Release
- publish
- ClientApp
- staging
- staging spa files go here!
- production
- production spa files go here!
- staging
- ClientApp
- publish
- Release
Once thats setup you can test it out with dotnet publish --configuration Release, the build output should look something like this,
Modifying your startup.cs
The final step is to modify your Startup.cs file to switch out which spa to use based on the environment variable,
1services.AddSpaStaticFiles(configuration => configuration.RootPath = WebHostEnvironment.IsDevelopment()
2                ? "ClientApp/build"
3                : $"ClientApp/{WebHostEnvironment.EnvironmentName}");
How to deploy 🚀
Deployment is now a simple case of running dotnet publish --configuration Release, once the published artefacts are deployed the app can now take its environment and run the appropriate spa. Build once and deploy anywhere!
Comments