July 11th, 2020 9 Minutes

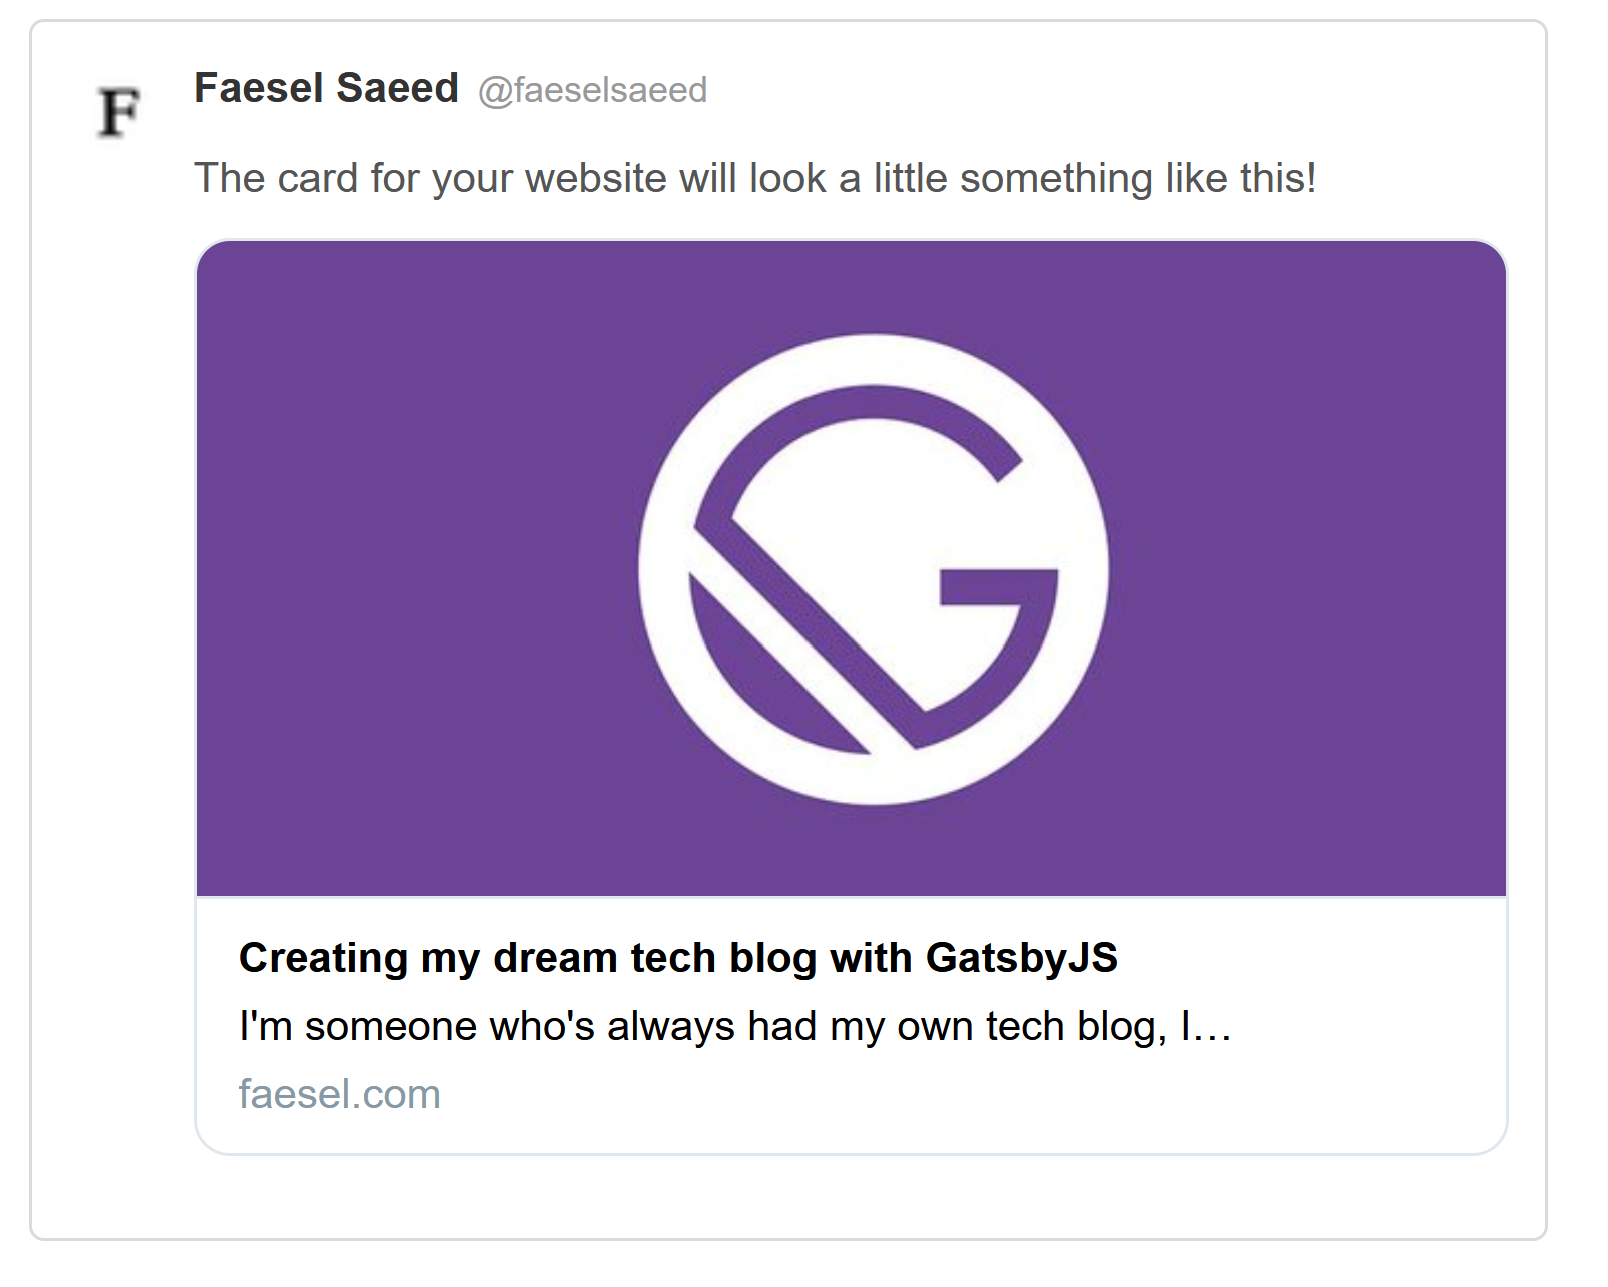
I recently recreated my blog in GatsbyJs, you can download a template of it here gatsby-techblog-starter. In the joy of sharing its simplicity to the world, I tweet about my intro article with a link to my website. To my dismay, I noticed the tweet was lacking a lot of formatting and information on the link... would you even see that link 👀?

I realised the secret sauce I was missing was called Open Graph Protocol. From the specifications website itself,
The Open Graph protocol enables any web page to become a rich object in a social graph. For instance, this is used on Facebook to allow any web page to have the same functionality as any other object on Facebook.
In essence its the mata tags you see below, that sites like Twitter, Linked In, Facebook use to correctly render an enriched link of the page on their website,
<meta data-react-helmet="true" name="twitter:card" content="summary_large_image">
<meta data-react-helmet="true" name="twitter:site" contact="@faeselsaeed">
<meta name="twitter:creator" content="" data-react-helmet="true">
<meta name="twitter:title" content="Creating my dream tech blog with GatsbyJS" data-react-helmet="true">
<meta name="twitter:description" content="I'm someone who's always had my own tech blog, I…" data-react-helmet="true">
<meta name="twitter:image" content="//images.ctfassets.net/wjg1udsw901v/6hjsGXkoyitmyiEuBdeTP2/c77e74af9235ac775f18836e2de07cac/gatsby-logo.jpg" data-react-helmet="true">

<meta property="og:site_name" content="" data-react-helmet="true">
<meta property="og:title" content="Creating my dream tech blog with GatsbyJS" data-react-helmet="true">
<meta property="og:url" content="https://www.faesel.com/blog/gatsby-tech-blog-starter" data-react-helmet="true">
<meta property="og:description" content="I'm someone who's always had my own tech blog, I…" data-react-helmet="true">
<meta property="og:image" content="//images.ctfassets.net/wjg1udsw901v/6hjsGXkoyitmyiEuBdeTP2/c77e74af9235ac775f18836e2de07cac/gatsby-logo.jpg" data-react-helmet="true">
<meta property="og:image:alt" content="Gatsby JS" data-react-helmet="true">
<meta property="og:type" content="article" data-react-helmet="true">
This article is about how I used Helmet JS to improve my sites shareability and improving its SEO capabilities.
Step 1 - Install those dependencies
The dependencies we are interested in are as follows:
npm intall gatsby-plugin-react-helmet react-helmet
You can read more about the gatsby plugin here along with more detailed information on Helmet js and all its supported tabs here
Step 2 - Store your constant's in your gatsby config
When creating a Gatsby website we always have a config file in the root of the project called gatsby-config.js, from here we can add various plugins like so,
module.exports = {
    plugins: [
        'gatsby-plugin-react-helmet'
    ]
}
This config file is also the place to store all you common reusable information in Gatsby's predefined siteMetadata tag (this tag makes it accessible through GraphQl). We will be using this later on to populate our head with various information.
module.exports = {
    siteMetadata: {
        title: 'FAESEL.COM',
        author: 'Faesel Saeed',
        description: 'Personal blog of Faesel Saeed',
        siteUrl: 'https://www.faesel.com',
        social: {
            linkedin: 'https://www.linkedin.com/in/faesel-saeed-a97b1614',
            twitter: 'https://twitter.com/@faeselsaeed',
            twitterUsername: '@faeselsaeed',
            github: 'https://github.com/faesel',
            flickr: 'https://www.flickr.com/photos/faesel/',
            email: '[email protected]'
        },
        rssFeedUrl: '/rss.xml'
    },
    ...
}
Step 3 - Create your head component
Now that we have all our static information in the config we can query this out using GraphQl through the objects > site > siteMetadata. We can also import in Helmet and start building up our Head meta data. My Head component looks like this,
import React from 'react'
import { Helmet } from 'react-helmet'
import { useStaticQuery, graphql } from 'gatsby'

import favicon from '../../static/favicon.ico'

const Head = ({ pageTitle, title, url, description, imageUrl, imageAlt, type datePublished }) => {
    const data = useStaticQuery(graphql`
        query {
            site {
                siteMetadata {
                    siteUrl,
                    title,
                    author,
                    social {
                        twitterUsername
                    }
                }
            }
        }
    `)

    return (
        <>
            <Helmet title={`${pageTitle} | ${data.site.siteMetadata.title}`} />
            <Helmet>
                <link rel="icon" href={favicon} />

                <meta name="twitter:card" content="summary_large_image"></meta>
                <meta name="twitter:site" contact={data.site.siteMetadata.social.twitterUsername}></meta>
                <meta name="twitter:creator" content={data.site.siteMetadata.twitterUsername}></meta>
                <meta name="twitter:title" content={title}></meta>
                <meta name="twitter:description" content={description}></meta>
                <meta name="twitter:image" content={imageUrl}></meta>

                <meta property="og:locale" content="en_GB" />
                <meta property="og:site_name" content={data.site.siteMetadata.title} />
                <meta property="og:title" content={title}></meta>
                <meta property="og:url" content={url}></meta>
                <meta property="og:description" content={description}></meta>
                <meta property="og:image" content={imageUrl}></meta>
                <meta property="og:image:alt" content={imageAlt}></meta>
                <meta property="og:type" content={type} />
            </Helmet>
        </>
    )
}

export default Head
(Note some of the properties get fleshed out later on in the article)
The Helmet component injects in HTML tags into the head of the HTML document. To understand what the tags represent within the Helmet component, and to see a full range of what's available use the following two links.
Step 3 - Using your head component
Using your head component is quite straight forward, its more a case of working out where to source all your properties. Here's what my page looks like,
import React from "react"
import { graphql } from "gatsby"
import Layout from "../components/layout"
import Head from "../components/head"

// Add some code here to get all your data from markdown, cms etc.

const Blog = props => {
  return (
    <Layout>
      <Head
        pageTitle={props.data.title}
        title={props.data.title}
        description={props.data.bodym.childMarkdownRemark.excerpt}
        url={`${props.data.site.siteMetadata.siteUrl}/blog/${props.data.slug}`}
        imageUrl={props.data.hero.file.url}
        imageAlt={props.data.hero.title}
        type='article'
        datePublished={props.data.contentfulBlog.iso8601DatePublished}/>

      <h1>My Great Blog Post</h1>
      ...
    </Layout>
  )
}

export default Blog
Step 4 - Go further with JSON-LD and Linked data
So far so great, we have enough here for most social media sites to understand the structure of our data and to use this to correctly format the information on a consuming website. But what do search engines use?
The answer is Json-ld and linked data, best explained by the specs website itself,
JSON-LD is a lightweight Linked Data format. It is easy for humans to read and write. It is based on the already successful JSON format and provides a way to help JSON data interoperate at Web-scale. JSON-LD is an ideal data format for programming environments, REST Web services, and unstructured databases such as Apache CouchDB and MongoDB.
and,
Linked Data empowers people that publish and use information on the Web. It is a way to create a network of standards-based, machine-readable data across Web sites. It allows an application to start at one piece of Linked Data, and follow embedded links to other pieces of Linked Data that are hosted on different sites across the Web.
To sum it up in one sentence we are using JSON data to create structured information so that websites can deep link with each other. With this in mind our head component looks like this:
import React from 'react'
import { Helmet } from 'react-helmet'
import { useStaticQuery, graphql } from 'gatsby'

const Head = ({ pageTitle, title, url, description, imageUrl, imageAlt, type, datePublished }) => {
    const data = useStaticQuery(graphql`
        query {
            site {
                siteMetadata {
                    siteUrl,
                    title,
                    author,
                    social {
                        twitterUsername
                    }
                }
            }
        }
    `)

    const ldJsonBreadcrumb = {
        '@context': 'https://schema.org',
        '@type': 'BreadcrumbList',
        'itemListElement': [{
            '@type': 'ListItem',
            'position': 1,
            'name': 'Home',
            'item': `${data.site.siteMetadata.siteUrl}/home`
        },{
            '@type': 'ListItem',
            'position': 2,
            'name': 'Blog',
            'item': `${data.site.siteMetadata.siteUrl}/blog`
        },{
            '@type': 'ListItem',
            'position': 3,
            'name': 'Projects',
            'item': `${data.site.siteMetadata.siteUrl}/projects`
        },{
            '@type': 'ListItem',
            'position': 4,
            'name': 'Contact',
            'item': `${data.site.siteMetadata.siteUrl}/contact`
        }]
      };

    const jsonldArticle = {
        '@context': 'http://schema.org',
        '@type': `${type}`,
        'description': `${description}`,
        'image': {
            '@type': 'ImageObject',
            'url': `${imageUrl}`
        },
        'mainEntityOfPage': {
            '@type': 'WebPage',
            '@id': `${data.site.siteMetadata.siteUrl}`
         },
        'inLanguage': 'en',
        'name': `${title}`,
        'headline': `${title}`,
        'url': `${url}`,
        'datePublished': `${datePublished}`,
        'dateModified': `${datePublished}`,
        'author': {
            '@type': 'Person',
            'name': `${data.site.siteMetadata.author}`
        },
        'publisher' : {
            '@type': 'Organization',
            'name': `${data.site.siteMetadata.author}`,
            'logo': {
                '@type': 'ImageObject',
                'url': `https://images.ctfassets.net/wjg1udsw901v/4RI5COhSqeYFCbvzYFeFZW/af52277ab41da56c1be5f72f316befe9/logo.png`
            }
        }
    };

    return (
        <>
            <Helmet>
                {/* other head elements go here */}

                <script type="application/ld+json">
                    {JSON.stringify(ldJsonBreadcrumb)}
                </script>

                {type === 'article' && (
                   <script type="application/ld+json">
                        {JSON.stringify(jsonldArticle)}
                    </script>
                )}

                {/* Meta properties go here */}

            </Helmet>
        </>
    )
}

export default Head
For more information on the structure you can read up on the W3C Json-LD specification document
To get an idea of the full range of tags available take a look at these two links (in the case of my website I only use BreadcrumbList and Article types depending on what content you have you may show something else).
Do note for the property datePublished you need to format your dates in ISO-8601 format. To save you a trip in google this up you can use the GraphQl query snippet below. The format definition comes from Moment JS which Gatsby is using under the hood.
iso8601DatePublished: datePublished(formatString: "YYYY-MM-DD[T]HH:mm:ss.SSS[Z]")
Step 5 - Validating your tags
There are actually various websites we can use to validate your tags and data. When building my website I used the following sources.
- Twitters Card testing tool
- Googles link for testing json-ld, testing and validating tool for JSON-LD. It goes as far as telling you if there are any missing tags.
- Matatags.io, great for previewing how you website links will render on all the social media websites
TIP 😎! If your implementing this retrospectively twitter will update all your previous tweets with with extra formatting, but it does take about a week. If you want to refresh it quicker, you can use the Twitters Card testing tool mentioned above to clear out the cache for an individual post.
After that you can begin to tweet with confidence 😁

